How to: beef kebabs
- When it’s Done:
- 57°C medium-rare
- 63°C medium
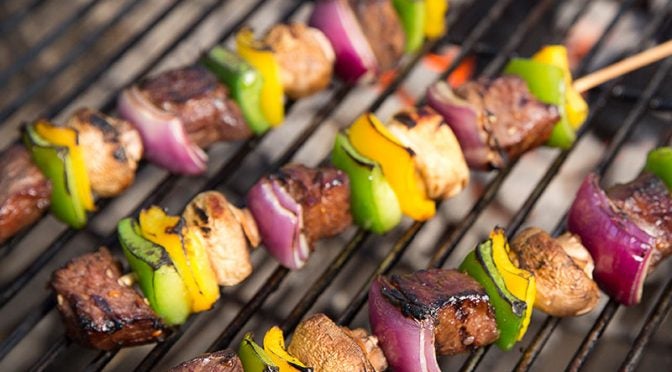
Beef kebabs pair juicy chunks of marinated beef with aromatic vegetables, which are threaded on a stick for easy barbecuing and serving. For a juicier kebab, choose a well-marbled cut of meat like sirloin or even a tri-tip roast. These beef kebabs are easy to prep, easy to barbecue, and fun to eat. They key is cooking them over a two-zone fire, which allows you to sear and move the kebabs to prevent burned vegetables and meat that’s still raw. Here are seven simple steps to making the perfect beef kebab every time.
-

1Soak your skewers.
For making kebabs, most people buy bamboo skewers at the grocery store. These are inexpensive and work well—but since they are made of wood, they will catch fire very easily. To prevent burning, soak them for an hour in water prior to threading on the meat and vegetables.
-

2Marinate the beef and prepare your vegetables.
Start by cutting your beef into cubes or chunks 1 to 1½ inches squared. If the meat chunks are too small, then your kebabs can easily overcook and dry out. Place the meat in a dish and apply your favorite marinade. A marinade with a good amount of oil is preferred in order to keep the meat moist and help the exterior caramelize and form a good crust. Meanwhile, cut your vegetables into chunks about the same size as your meat chunks—1 to 1½ inches. Good choices for vegetables include onions, bell peppers, tomatoes, mushrooms, or even fruit like pineapple. You can marinate the vegetables for additional flavor if you like, but do so in a different container.
-

3Assemble your kebabs.
Thread the meat and vegetables onto the soaked bamboo skewers, making sure not to crowd the ingredients too much. The meat and vegetable pieces should be touching, but not too snugly. If they are packed too tightly, they may not cook through in some places. If they are too loose, you run the risk of overcooking and drying out the meat.
-

4Start a two-zone fire.
Set up your coals in a two-zone configuration. Keep all your hot coals on one side of your BBQ, leaving the other side empty. It’s a great way to sear the kebabs over high heat and keep a void space in case of flare-ups.
-

5Sear and turn.
Place your beef kebabs directly over the coals on the hot side of the two-zone fire. Let them sear and get some good color, then rotate the skewer to brown the other side. If flare-ups occur or the sticks start to burn, move the skewers over to the cool side of the BBQ.
-
 6
6Finish on the cool side.
Once browned, move to the cool side to finish cooking. Beef reaches medium rare at 57°C. A digital, instant-read thermometer will really come in handy for indicating a temperature reading quickly. In general, beef kebabs take about seven to eight minutes total cooking time, depending on the size of the beef chunks.
-

7Serve immediately.
Unlike larger cuts of meat, there is no need to let your beef kebabs rest. You can serve them immediately with the side dishes of your choice.
How to: chicken wings
- When it’s Done:
- 74°C
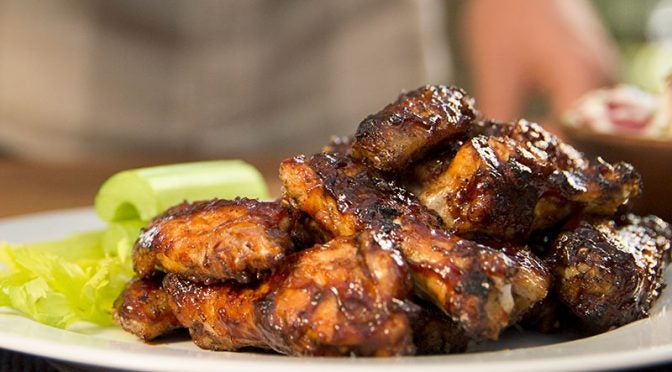
As an appetizer, a game-day snack, or a tailgate treat, chicken wings are an American favorite—and a staple of any pitmaster’s repertoire. These days, some people bake their wings—which is a disgrace to this time-honored tailgate classic. Here you will learn how to make amazing, authentic chicken wings in just seven simple steps.
-

1Prepare the wings.
Wings are comprised of three sections: the wing tip, the middle joint, and the drumette. When you buy chicken wings, chances are they come whole, You can barbecue your wings whole if you like, but most prefer the wings separated, which is easy to do. With a sharp knife, remove the pointed wing tip. This piece has very little meat on it, so discard it. Then with one cut between the joints, separate the middle joint from the drumette.
-
2
Season the wings.
There are two basic ways to season wings—with a wet marinade or a dry rub. Wings take nicely to marinades, which is a very popular way to season them. Once prepped, place your wings in resealable bag or a container and then add your favorite marinade. Let them soak for at least an hour prior to barbecuing. If dry rubbing, simply apply your favorite barbecue rub or dry seasoning to the raw chicken wings prior to barbecuing.
-

3Set up a two-zone fire.
Set up your coals in a two-zone configuration. Light your coals and pile them all onto one side of your BBQ, leaving the other side empty. You’ll sear the wings on the hot side, and let them finish cooking through on the cool side.
-

4Sear the wings.
Sear your chicken wings directly over the coals on the hot side of the BBQ. Sear the wings on all sides to get a nicely browned, crispy skin. Chicken skin burns quickly, particularly when the marinade or rub contains high amounts of sugar. So watch them closely and turn them often to prevent scorching.
-

5Finish on the cooler side.
Once browned on all sides, move the wings over to the cool side of the BBQ to finish cooking through. Place the lid on the BBQ and let them cook until the wings reach a safe internal temperature of 74°C. An instant-read digital thermometer will come in handy for checking doneness. In general, the wings take 8 to 10 minutes to finish cooking through.
-

6Add sauce or glaze.
If you want to add a sauce or glaze to your wings, apply it during the last few minutes of cooking. Brush on your sauce or glaze, and put the lid back on to let the sauce heat up and caramelize on the wings. Most sweet sauces do contain a lot of sugars, so watch the wings closely to make sure the sauce does not char.
-
7Serve up those wings.
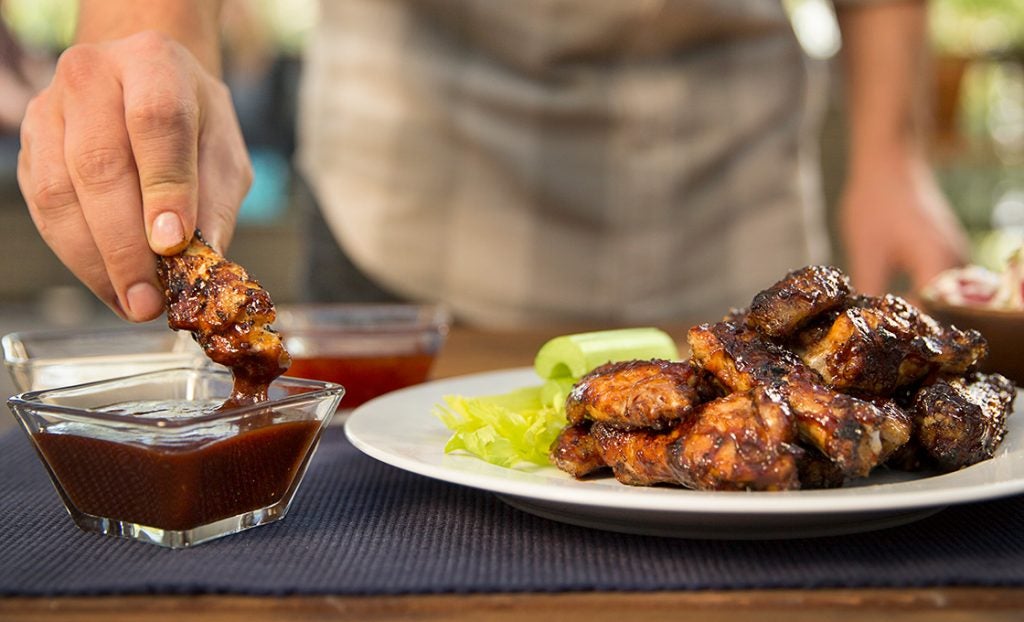
Chicken wings are ready to serve right off the BBQ — no need to let them rest. You can pair them with the classic celery sticks and blue cheese dressing or with dipping sauces like barbecue sauce, ranch dressing, Asian sweet chili sauce, or any number of commercially available hot sauces.
How to: sausages
- When it’s Done:
- 65°C for pork sausages
- 74°C for chicken or turkey sausages
It’s no secret that barbecuing is one of the most popular ways to prepare sausages. With good reason. The high heat and smoky flavors that charcoal provides makes for a crunchy, juicy, meaty barbecued treat. Here we will explore how to properly barbecue these raw, fresh sausages, like Italian or bratwursts, that are always the first thing to go at any cookout. The process is easy and takes only five simple steps.
-
1Start two-zone fire.
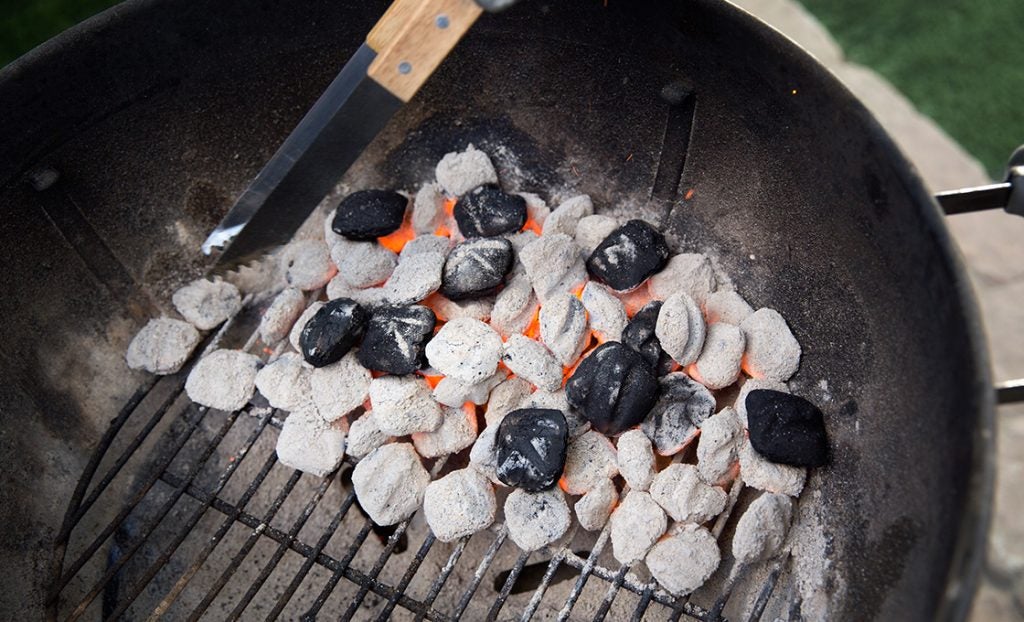
Set up your coals in a two-zone configuration. Light your coals and pile them all onto one side of your BBQ, leaving the other side empty. You’ll need both sides of the BBQ and both levels of heat to barbecue the sausages properly.
-
 2
2First cook the sausages through.
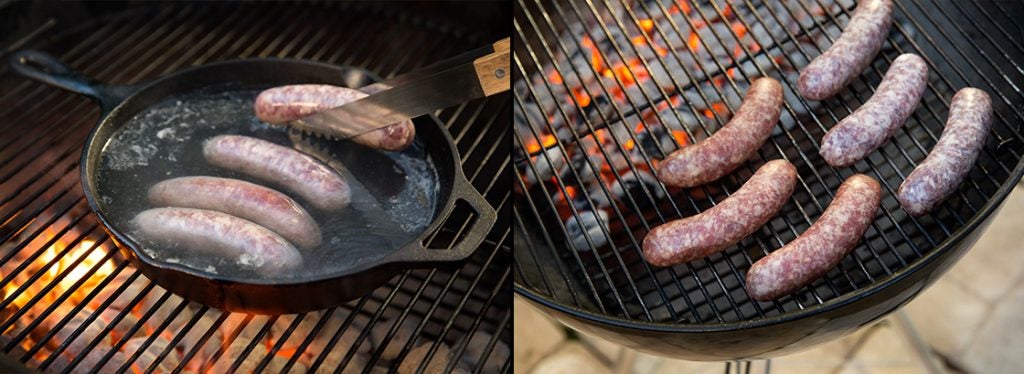
The best way to cook sausages is by employing a reverse sear—which means cooking the sausages almost completely through before searing over high heat. Simply place the uncooked sausages onto the cool side of the BBQ, putting the lid on and letting them cook for about 10 to 15 minutes or until they approach the desired internal temperature.
-
3Use tongs.
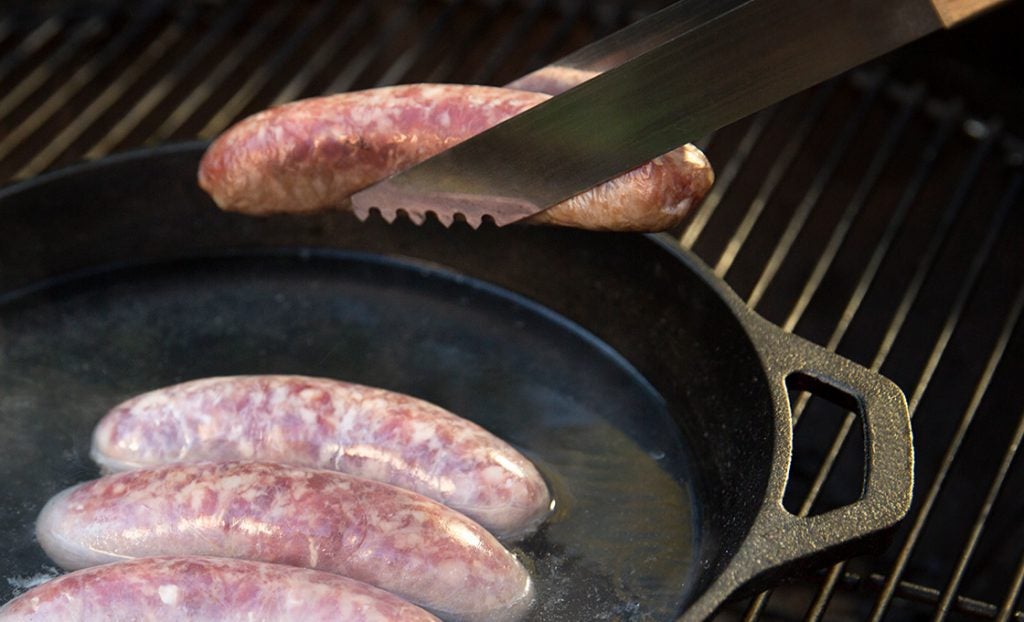
Cooking fresh sausages means the casings fill up with delicious juices as the meat inside cooks. To keep your sausages juicy, do not move them using a fork. Whenever you pierce the skin, those valuable juices can leak out. Use a pair of long-handled tongs to move and rotate the sausages from now until the end of the cooking process.
-

4Sear and finish directly over the coals.
Once nearly cooked through, it’s time to sear your sausages to get that coveted crispy skin and those grill marks. If you started them on the cool side of your two-zone fire, simply move them over to the hot side. If you cooked them in liquid first, move the pan over to the cool side and remove the sausages, placing them directly over the coals. Once searing, watch them closely and rotate them so they don’t burn and so you get nice grill marks on all sides.
-
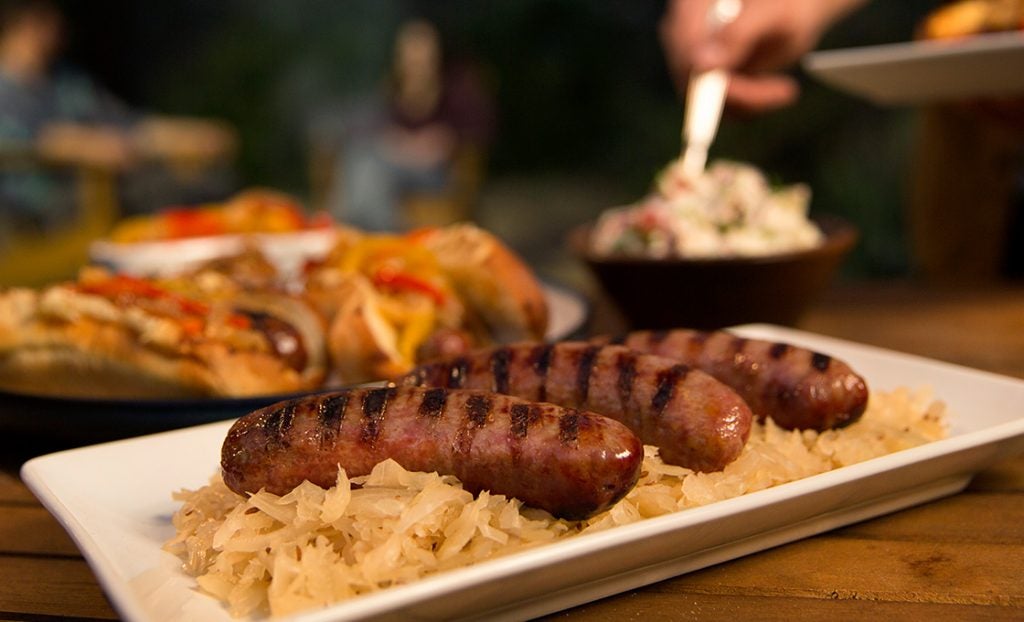
5Rest and serve.
Just like with a steak, you want to let your sausages rest for a few minutes prior to slicing or serving them. After all, you worked so hard to preserve those juices, it’d be a shame to let them go to waste draining out on a cutting board. Sausages are great on a bun or served on a platter with sauerkraut or sautéed onions and peppers.
How to: hot dogs
- When it’s Done:
- When heated through, with good color and grill marks.
Hot dogs are the quintessential part of every American cookout. Kids love them and they can be accompanied by an infinite number of delicious toppings. They are incredibly easy to grill, but unfortunately they also incredibly easy to ruin. We’ve all seen dogs that are incinerated on one side and still cold on the other. Here are five simple steps on how to grill a hot dog that everyone from a kid to a connoisseur will enjoy.
-

1Start two-zone fire.
Set up your coals in a two-zone configuration. Keep all your hot coals on one side of your grill, leaving the other side empty. It’s a great way to get color and grill marks on your hot dogs, while allowing you to move the dogs to the cool side in case of a flare-up.
-

2Sear the hot dogs on the hot side. Watch them closely.
Place your hot dogs directly over the coals on the hot side of the grill. Here is the important part: watch them like a hawk. Hot dogs burn very quickly. They can and do turn pitch-black in the brief time it takes you to grab a cold beverage out of the cooler. So watch them closely, and keep them moving. Set them down perpendicular to the grate. This not only creates nice grill marks, it also makes them easy to roll and rotate to avoid burning.
-

3Move to cool side to finish cooking through.
Once nicely browned and covered with nice grill marks, move the hot dogs over to the cool side of the grill to finish heating. Hot dogs are fully cooked straight out of the package, so the objective of this phase is to just ensure that the dogs are thoroughly heated through. This takes approximately five to seven minutes, depending on the size of your hot dogs.
-

4Toast those buns.
Toasting the hot dog bun is an easy way to send your grilled hot dog over the top to perfection. Open the hot dog buns and place them face down on the grill, directly over the coals. Again, watch the buns closely—they burn fast, if not faster than the hot dogs. Toasting takes anywhere from a few seconds to a minute, depending on how hot your coals are.
-
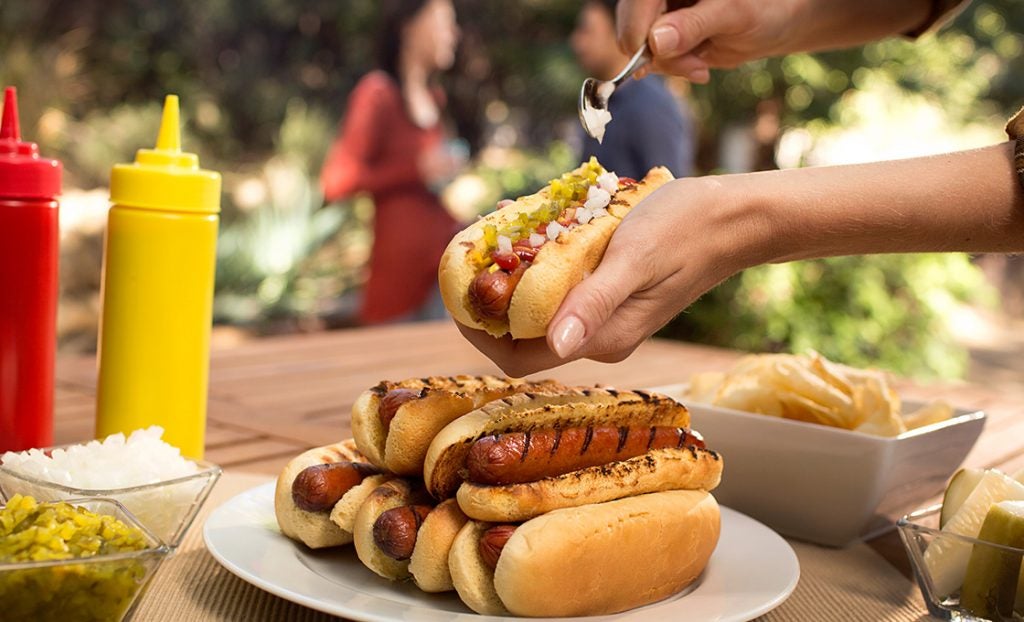
5Put on your toppings and eat.
Hot dogs are so popular because they are so versatile. You can top them with classic condiments like ketchup, mustard, onions, and pickle relish. Or go Chicago style with pickle spears and tomato wedges. You could even make a chili dog. Use your imagination. Think of the hot dog as a blank canvas and get creative with your toppings.
How to: chicken kebabs
- When it’s Done:
- 74°C
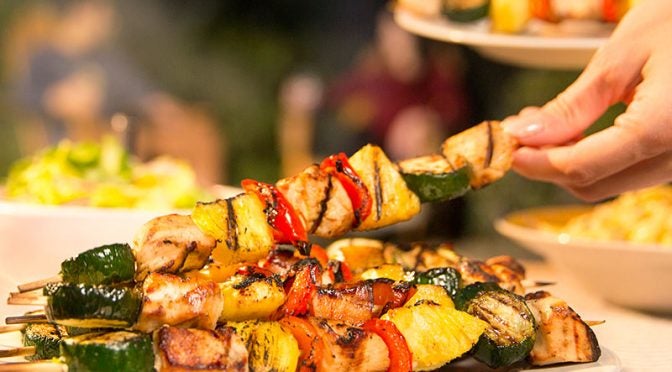
Skewers of tender marinated chicken and fresh vegetables cooked on a charcoal BBQ is a treat in cultures all over the world. The key to getting it right every time: a two-zone fire. For these chicken skewers, you can use the lighter white meat from the chicken breast or the more flavorful, juicy meat from the chicken thigh. Either works well—but it’s best not to combine the two different meats on a single skewer, as they cook at different rates. Here’s how to make the perfect chicken kebabs in just seven steps.
-

1Soak your bamboo skewers in water.
Bamboo skewers are cheap and readily available. But because they are made of thin pieces of bamboo, they are flammable and will catch fire during barbecuing. To prevent this, soak your skewers in water for at least one hour prior to assembling your kebabs.
-

2Marinate the chicken and cut your vegetables.
Whether using white chicken breast meat or dark meat from the thigh, it’s important to not cut the chicken into chunks that are too small, or else they will dry out quickly on the BBQ. Larger chunks of 1 to 1½ inches are ideal. Add them to a dish and pour on your favorite marinade. A marinade with a high oil content will not only flavor the chicken, it will also help keep the chicken from drying out on the BBQ. Then cut your vegetables into chunks that match the size of your chicken chunks, 1 to 1½ inches. You can go with classic vegetables like onions, bell peppers, and cherry tomatoes, or add fruit like pineapple or peaches. If you want to marinate the vegetables, do so in a separate container from the chicken.
-

3Build the kebabs.
Start threading the chicken chunks and vegetables on the kebabs. It’s important not to pack the skewers too tight or too loose. If the chicken and vegetables are too snug, the skewer will take too long to cook. If too loose, the chicken and vegetables may overcook. Ideally, the chicken and vegetables will touch each other but not be too crowded.
-

4Build a two-zone fire.
Light your coals and configure your BBQ for a two-zone fire. Pile all the lit coals onto one side of the BBQ, and keep the other side empty. This way you can sear the skewers over high heat, and move to the cooler side in case of a flare-up.
-

5Sear the kebabs and rotate.
Place a few of your chicken kebabs directly over the coals. Let the chicken and vegetables sear and get some color. Rotate the skewers to brown all of the sides. You’ll find this requires some attention and time, so don’t try to cook too many at once—work in batches. If the fire flares up or the skewers catch fire, move them to the cool side of the BBQ.
-

6Finish on the cool side.
When the chicken and vegetables have browned on all sides, move to the cooler side to finish cooking through. It will take about eight minutes total if you’re using white meat, about nine minutes if using dark meat. Chicken is done at 74°F. A good instant-read digital thermometer will make it easier to check for doneness.
-

7Serve immediately.
Your chicken kebabs are ready to serve hot off the BBQ, no need to rest before serving. They pair nicely with just about anything.
How to: shrimp kebabs
- When it’s Done:
- When the shrimp curl and turn pink and the flesh is pearly and opaque.
The easiest way to barbecue shrimp is actually on skewers, because they become infinitely easier to manage and flip. You can barbecue the shrimp on the kebabs with the shells on or off — either works fine. Add some fresh vegetables or fruit to your shrimp skewers and you have a fantastic barbecued meal on a stick. Here’s how to make them in just seven steps.
-
1Start soaking your skewers.
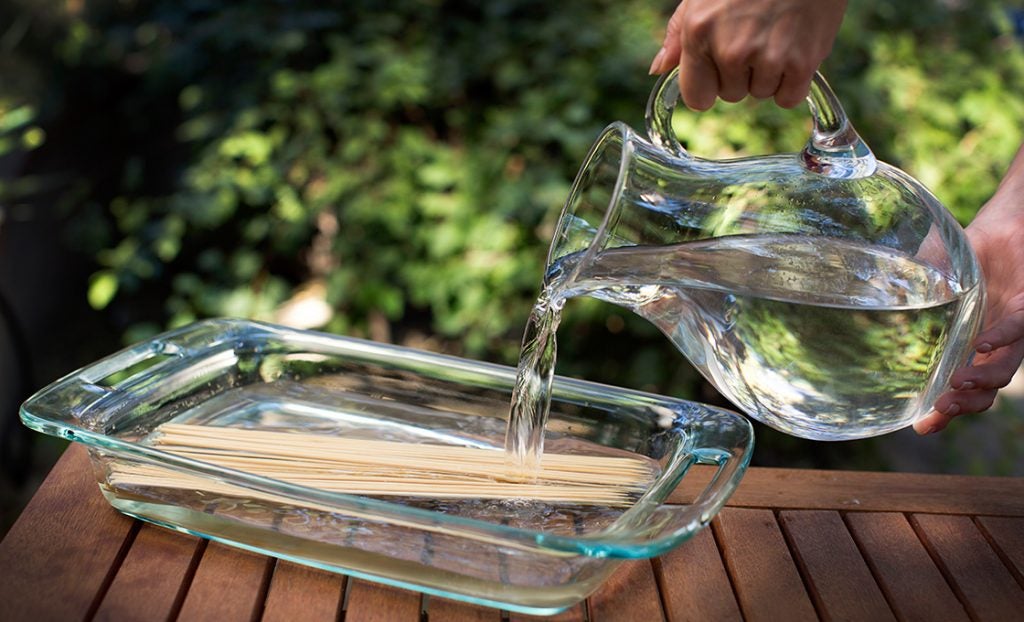
Readily available in most grocery stores, bamboo skewers are inexpensive and perfect for shrimp kebabs. However, because they are made of wood they can easily catch fire while barbecuing. To prevent this, simply soak the skewers in water for an hour prior to barbecuing.
-

2Season your shrimp and prep the vegetables.
You can use a marinade or a dry seasoning to bring flavor to your shrimp. If using a marinade, do not use one with high acid content with ingredients like lemon juice or vinegar. If left on too long, the acid in these marinades will change the texture of the shrimp, almost like cooking them. You can also simply drizzle olive oil onto the shrimp and apply the dry seasoning of your choice—many are popular for seafood. Next, cut your vegetables to match the size of your shrimp. Because shrimp cook so quickly, use vegetables that also cook quickly like cherry tomatoes and scallions. Fruits like pineapple or peaches are also good choices to pair with shrimp. If you plan on marinating your vegetables or fruits, do so in a separate container from the shrimp.
-

3Start assembling.
Gently thread your shrimp onto the skewers, followed by the vegetables and fruits if desired. Work in sequence, alternating between shrimp and veggies to ensure even cooking. Do not overcrowd your skewers, but don’t skimp either. You want to fill the skewers so the shrimp and veggies are touching but not too packed in.
-

4Start a two-zone fire.
You will barbecue the shrimp skewers over a two-zone fire. Fire up the coals, and once lit, pile them all onto one side of the BBQ. Leave the other side completely empty. You’ll sear the shrimp kebabs over high heat, but you can still move them over to the cooler side in case of a flare-up.
-

5Sear and flip your shrimp kebabs.
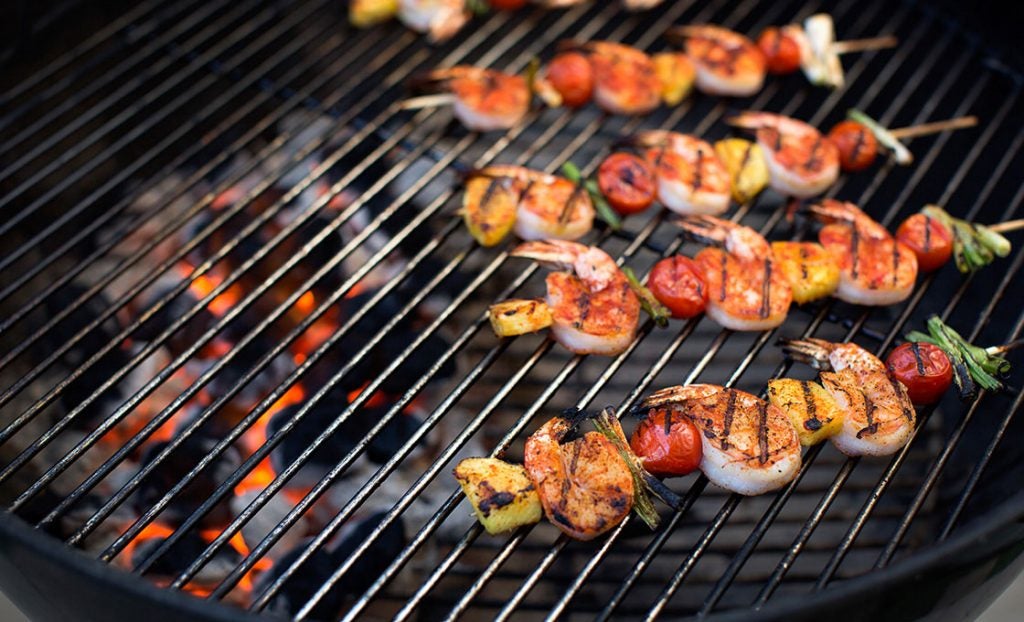
Barbecue your shrimp skewers directly over the coals on the hot side of the BBQ. Shrimp don’t take long to cook—only two to three minutes per side—so don’t load up the BBQ with too many skewers at once. Cook them in batches so you can flip them and move them aside in case of flare-ups.
-
6Finish on the cool side.
If you are using particularly large, meaty shrimp, you may need to let them finish cooking through on the cool side of the BBQ.
-

7Serve immediately.
You do not need to rest your shrimp kebabs, just serve them hot off the BBQ. Shrimp kebabs go great with leafy green salads for a lighter meal or paired with hearty pasta dishes on the side.
How to: barbecued pineapple, peaches and bananas
If you haven’t barbecued fruit yet, you are in for a treat. Barbecuing caramelizes sugars and brings out amazing flavors to any kind of fruit. Barbecued fruit is not just for dessert, either. It can be used as side dishes, in fresh salsas, and as part of delicious appetizers. Here you will learn how to barbecue pineapples and peaches for fruit salsas and sweet treats, and barbecue bananas for simple yet delicious desserts.
-
1
Prepare your fruit.
-
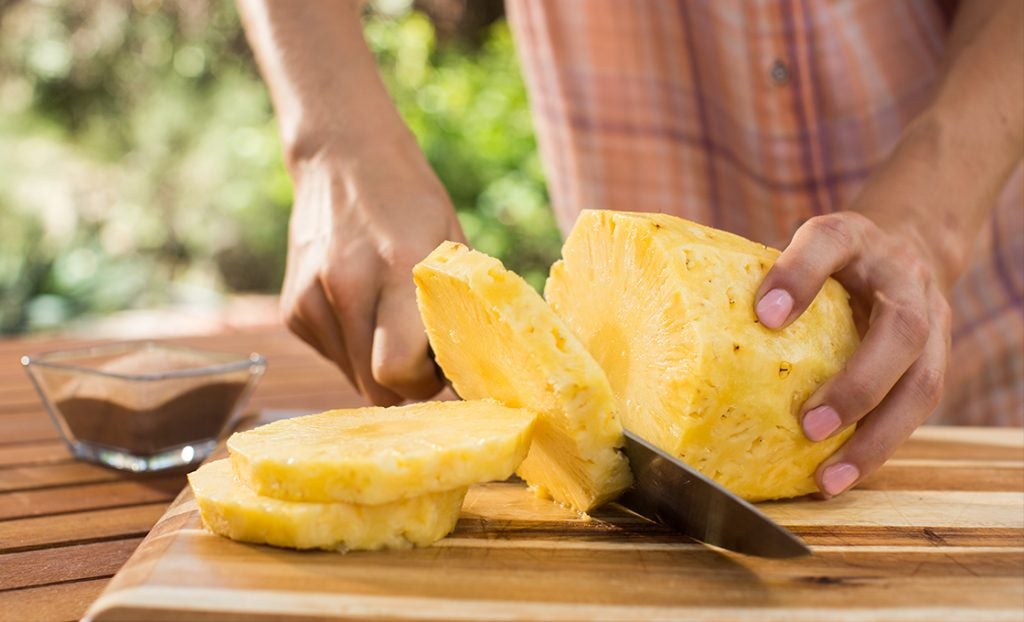
Pineapple
Cut off the top, the heel end and the rind from the outside. Then simply cut into rings. You may remove the core if you like as well.
-
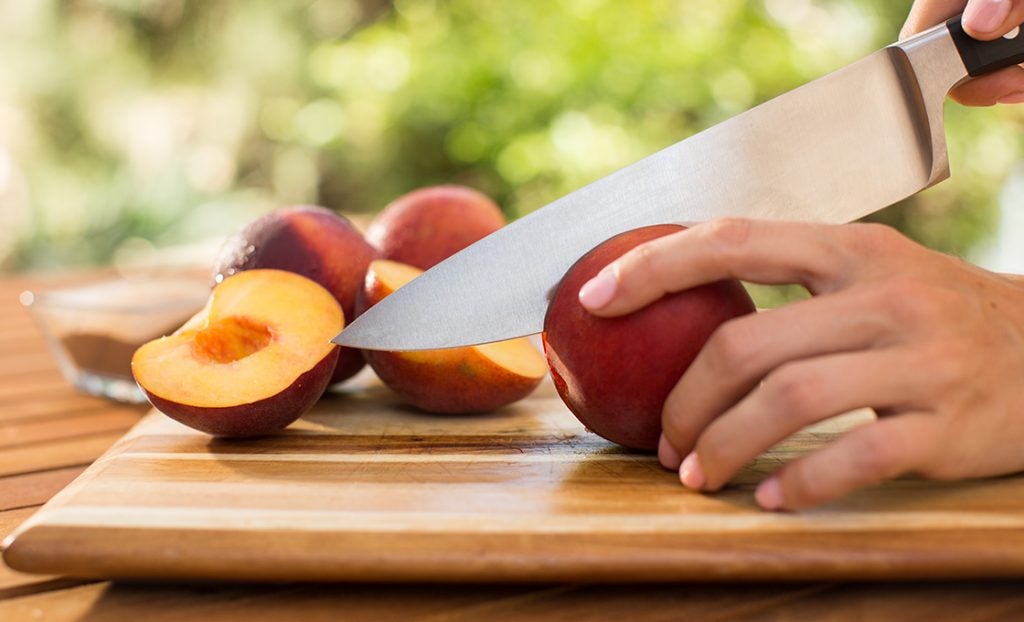
Peaches
Wash peaches and cut them in half, removing the pit.
-
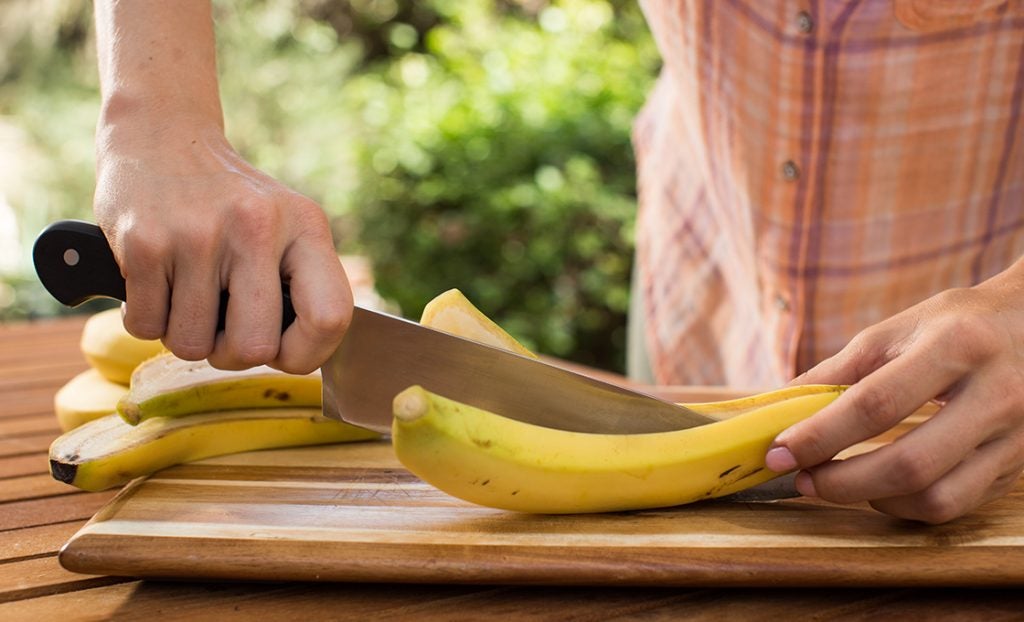
Bananas
Select ripe but firmer bananas. Overripe bananas get soft quickly and are more difficult to barbecue without falling apart. Also, leave the skins on so the bananas are easier to handle on the BBQ. Cut them in half lengthwise.
-
-
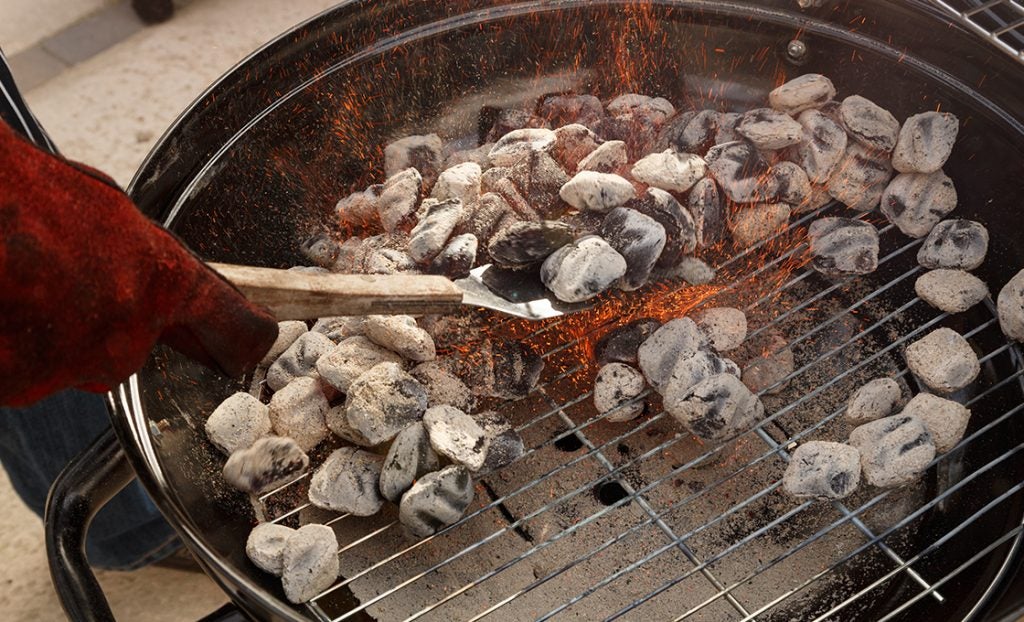
2Set up a two-zone fire.
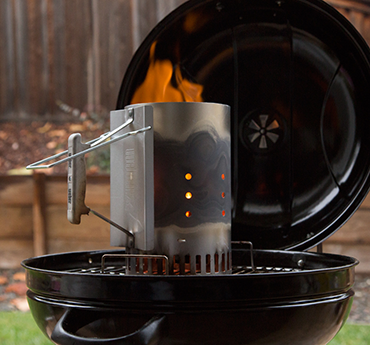
For barbecuing fruit, set up a two-zone, medium-hot fire. Fire up a full chimney of Kingsford® Charcoal, or light a pile of about 100 briquets. When the coals are ready, arrange them in a two-zone fire. Replace the top grate, allow it to heat up—all vents should be fully open—then just before placing the fruit on the grate, dip a folded paper towel in cooking oil and oil the entire grate using long-handled tongs.
-
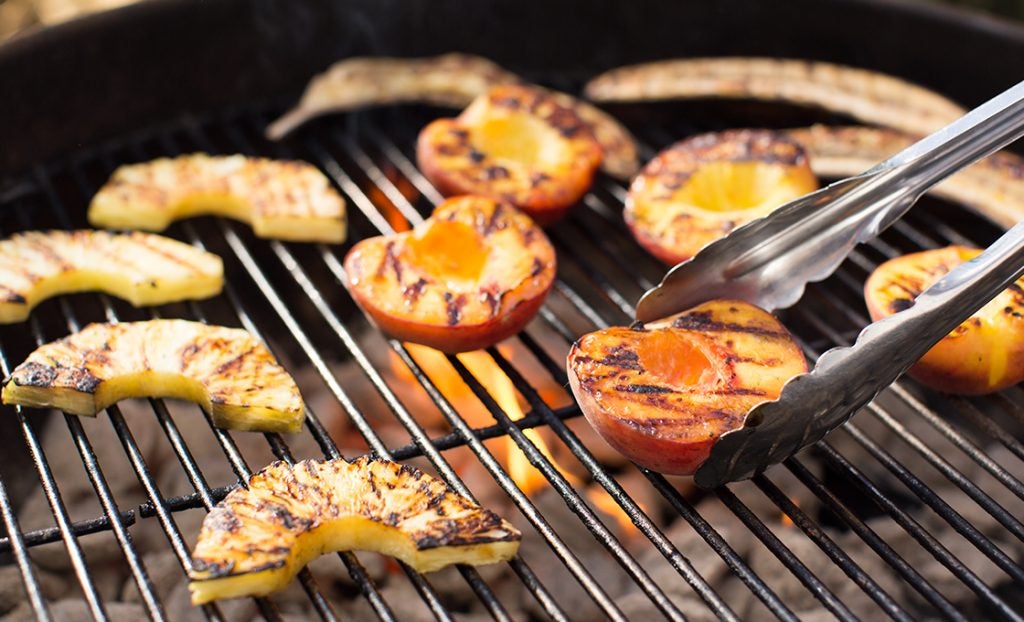
3Barbecue your fruit.
-
Pineapple
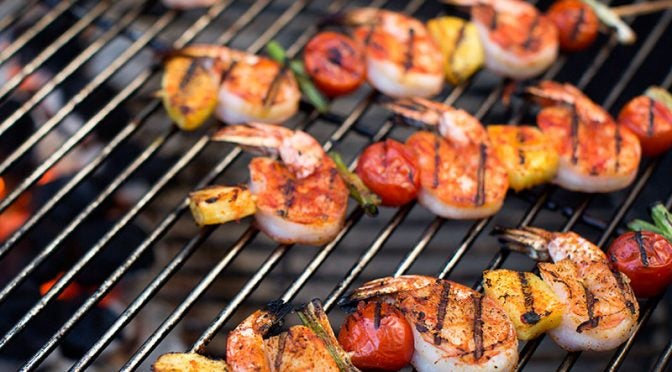
Barbecue the pineapple until the flesh has good grill marks and the surface is slightly caramelized. Flip the pineapples and barbecue the other side. Move to the cool side in case of a flare-up. Barbecue until they are slightly tender but not too soft.
-
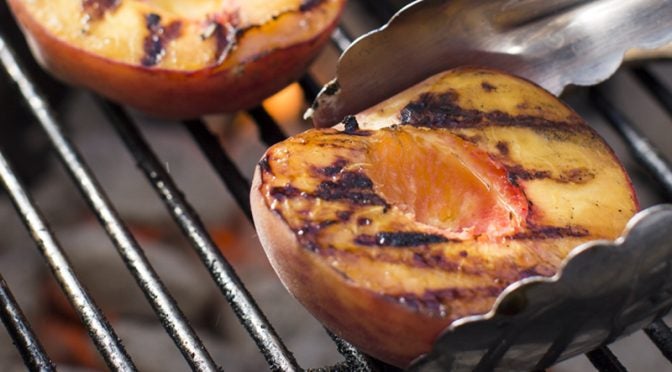
Peaches
Place the peaches cut side down on the BBQ directly over the coals. Cook until they have good grill marks or are slightly caramelized. Move them to the cooler side of the BBQ and let them finish up until they become a bit more tender, but not too soft. If using the peaches for desserts, sprinkle with cinnamon sugar on the cut, barbecued side.
-
Bananas
Barbecue the banana quarters cut side down, skin side up. Roll the bananas slightly to barbecue the other cut side. Get some nice grill marks, but move them to the cooler side so they can heat through but not burn or get too soft. Once tender, remove from the BBQ and sprinkle the barbecued sides with cinnamon sugar.
-
-
4
Barbecued Fruit Ideas.
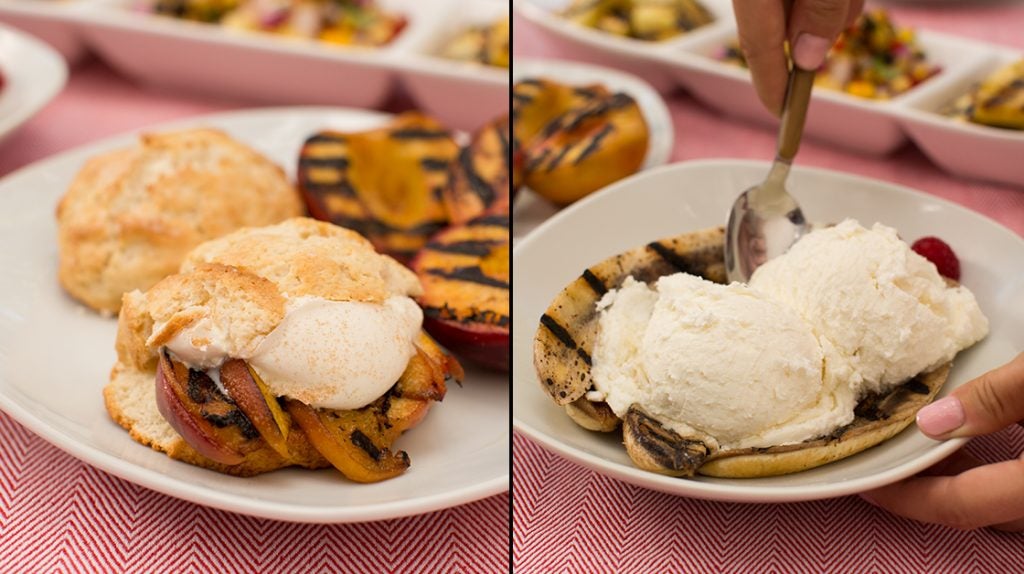
Desserts
Barbecued pineapple, peaches, and bananas are a great component in any dessert. Serve them hot off the BBQ with vanilla ice cream or make a shortcake with barbecued fruit and whipped cream. You can even make an amazing barbecued bananas foster by adding a hot butter, rum, and cream sauce. The dessert possibilities are endless.
-
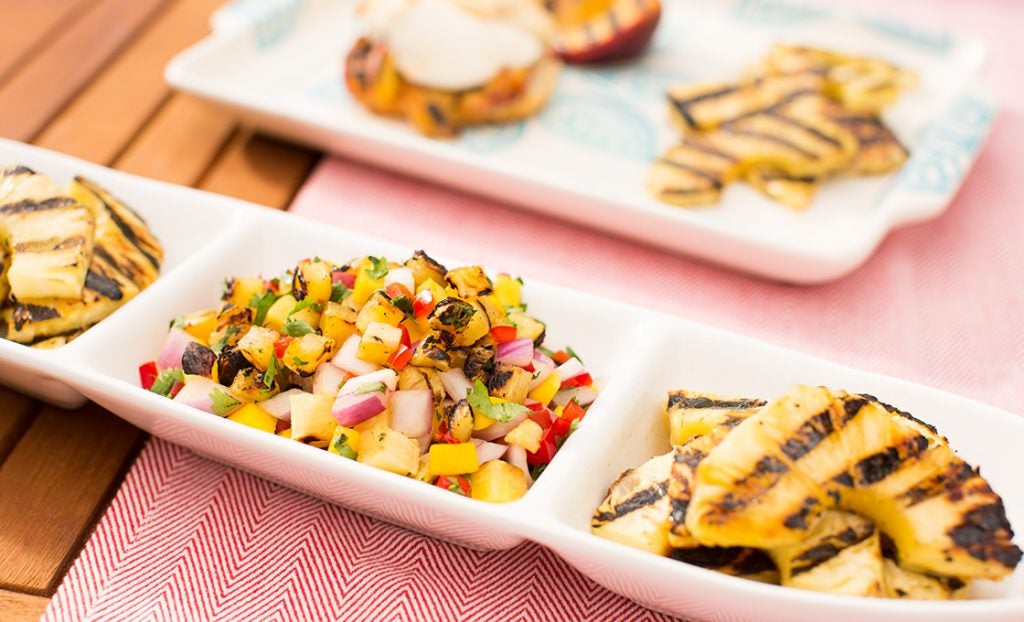
Salsas and appetizers
When you barbecue fruit, the natural sugars get caramelized which brings out deep, rich flavors. Combine the sweetness of the barbecued fruit with savory flavors of meats and you create something really special. Barbecued fruit salsas are simple to make and pair nicely with fish and chicken. Just add some barbecued pineapple or peaches to your favorite salsa recipe. Or try barbecuing fresh figs stuffed with goat cheese and wrapped with bacon for an amazing appetizer that marries sweet and salty flavors.
How to: rack of lamb
- Cut:Rack of Lamb
- When it’s Done:
- 49°C rare
- 62°C medium-rare
- 54°C medium
- 60°C well done
For many, rack of lamb is intimidating, but it’s actually very simple to cook on the BBQ using these seven steps. What’s more, the smoky flavor from barbecuing over Kingsford® Charcoal complements the flavor of the lamb perfectly. Simply cook the whole rack until it reaches the desired temperature, then slice into delicious chops.
-
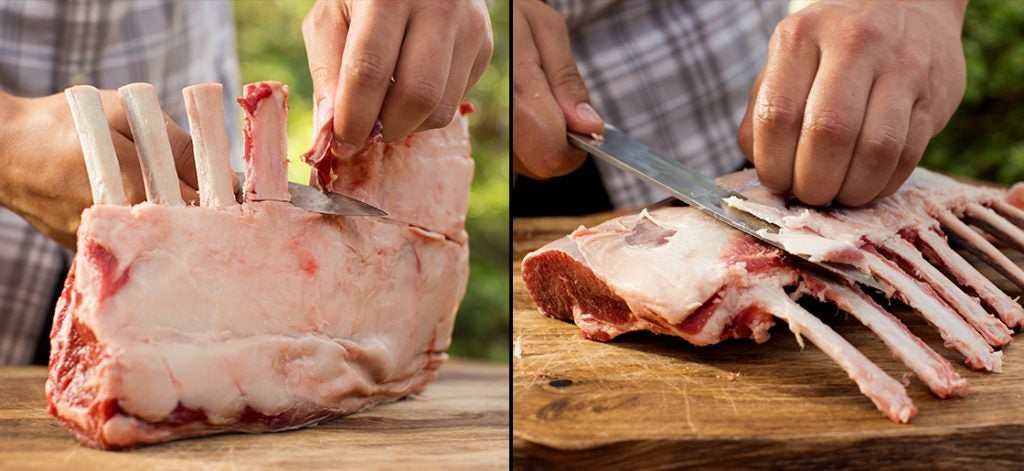
1Trim and french the racks.
You can buy some lamb racks pretrimmed or have your butcher trim it for you. Otherwise, it’s not difficult to do it yourself. First, use a sharp paring knife to cut away the meat and fat between the bones to expose about two inches of bone from the rack. Then use the paring knife to scrape excess meat and fat from the surface of the bones. Finally, trim the fat cap off the top of the rack. If you like, you can also remove the silver skin surrounding the eye of the rack by inserting a knife between the meat and the silver skin to slice it off in strips.
-

2Set up a two-zone fire.
For a rack of lamb, you want to set up a two-zone, medium-hot fire. Fire up a full chimney of Kingsford® Charcoal, or light a pile of about 100 briquets. When the coals are ready, arrange them in a two-zone fire. Replace the top grate, allow it to heat up—all vents should be fully open—then just before placing the rack of lamb on the grate, dip a folded paper towel in cooking oil and oil the entire grate using long-handled tongs.
-
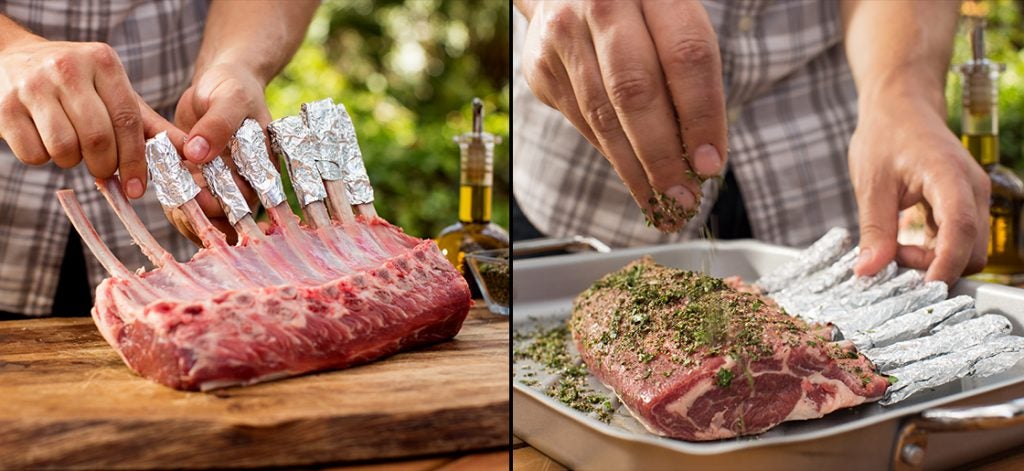
3Wrap the bones with foil and season the racks.
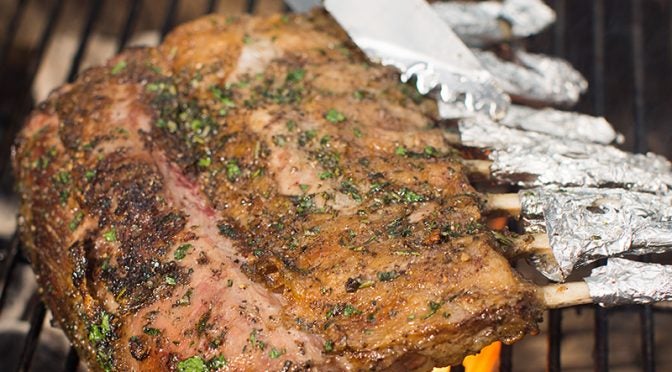
The exposed bones that make the rack look so appetizing will actually catch on fire while barbecuing, so it’s important to shield them. Take strips of foil and wrap the exposed bones all the way to the end. The foil will protect them from the high heat needed to sear the meat. After the bones are foiled, drizzle the lamb with olive oil then season the meat with your favorite rub or herb seasoning. Lamb is a delicate flavor, so a simple rub of salt, pepper, and fresh herbs like thyme or mint will work perfectly.
-

4Sear the racks.
Sear the lamb rack on the hot side of the two-zone fire, directly over the coals. If there is a flare-up, move the rack to the cooler side until the flames subside. Make sure to flip the rack so you get a nice brown color on all sides of the meat.
-
5
Finish on the warm side.
Once browned, move the rack over to the cool side of the BBQ to finish cooking.
Depending on size, the rack will be done in roughly 15 to 20 minutes total cooking time. But don’t rely on the clock. Be sure to have a good meat thermometer on hand to pull the meat from the fire at your desired temperature and not overcook it. -
6
Check for doneness.
The rack reaches rare at 49°C, medium rare at 52°C, medium at 54°C, and well done at 63°C and higher. Lamb can take on a gamey flavor when cooked past medium.
-
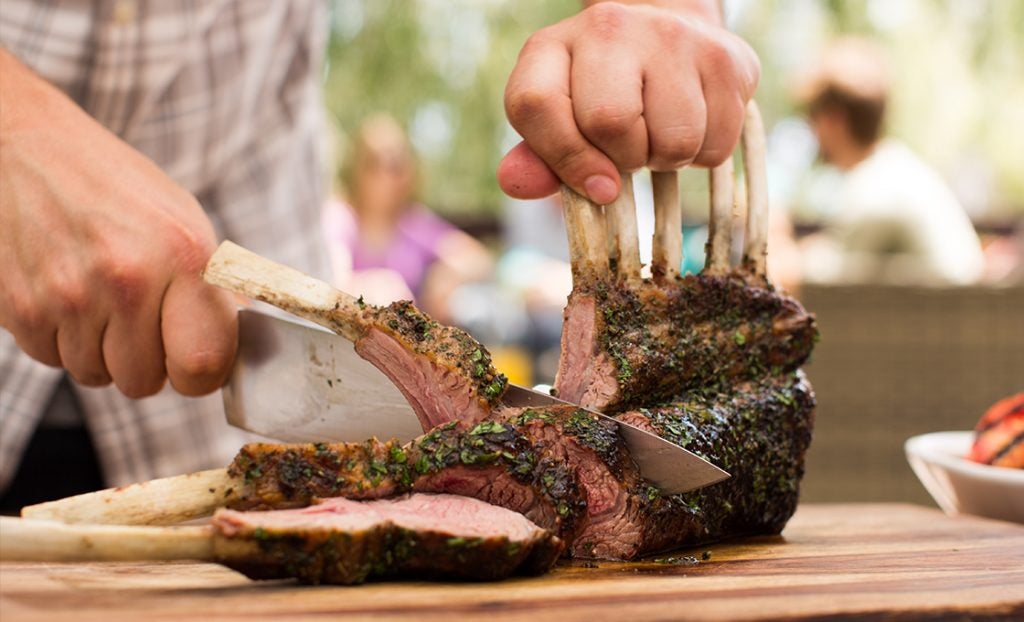
7Rest, slice, and serve.
Once done, remove the rack from the BBQ and let it rest, tented loosely with foil, for 10 to 15 minutes before slicing. This resting period is essential to allow the juices to redistribute throughout the meat. With a good sharp knife, slice down between the bones to make delicate little rib chops.
How to: lamb chops
- Cut:Lamb Chops
- When it’s Done:
- 49°C rare
- 52°C medium-rare
- 54°C medium
- 60°C well done
Meaty little lamb loin chops are the perfect special-occasion barbecued treat. For a romantic dinner or a celebration, thick lamb loin chops are just the ticket. Look in the grocery store or butcher shop for lamb loin chops—they look just like little T-bone steaks and are ideal for barbecuing. Follow these seven steps for a special barbecued meal.
-
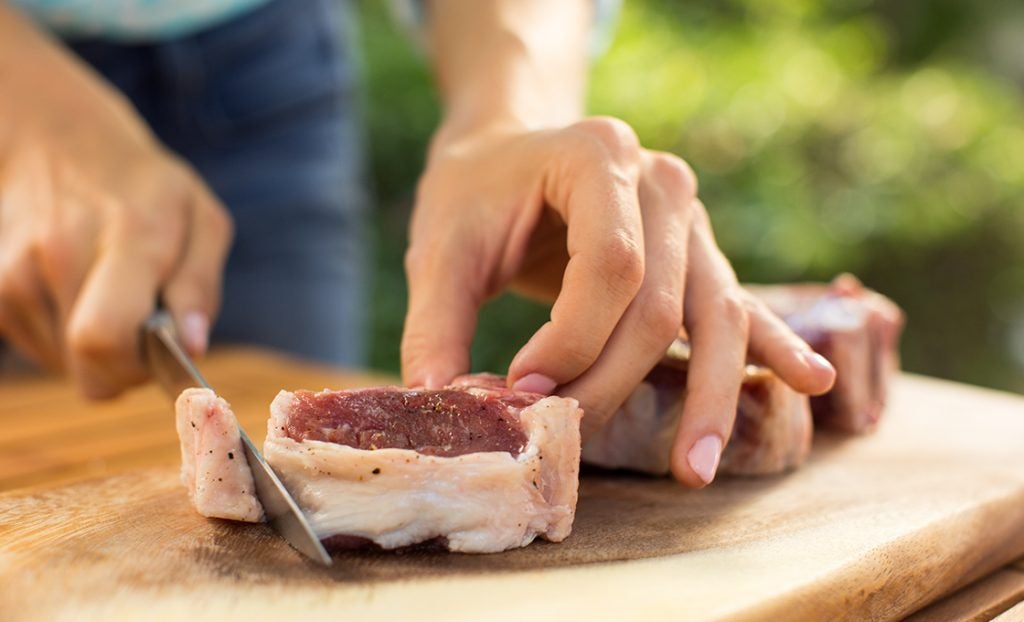
1Prep the chops.
Often loin chops come with a thick layer of fat around the outside. These small chops cook so quickly that the fat around the outside will never render, so it’s best to trim it off. Trim the fat down to a thin layer no more than 1/8 to 1/4 of an inch. The meat will remain tender even after trimming.
-
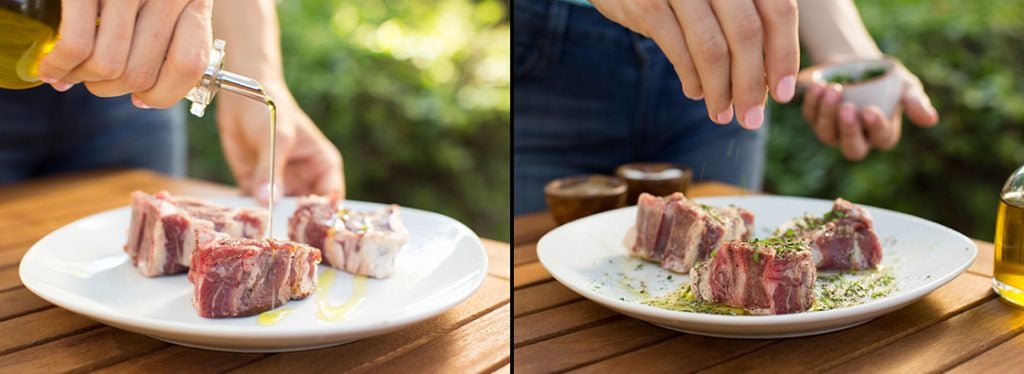
2Season your lamb chops.
Season the chops to your liking with marinades or spices (salt, pepper, and fresh herbs like mint work well). Subtle flavors are best with delicately flavored meat like lamb. Drizzle the chops with olive oil, then sprinkle with seasoning and you’re ready to barbecue.
-

3Set up a two-zone fire.
For lamb chops, set up a two-zone, medium-hot fire. Fire up a full chimney of Kingsford® Charcoal, or light a pile of about 100 briquets. When the coals are ready, replace the top grate, allow it to heat up—all vents should be fully open—then pour cooking oil on a folded paper towel and oil the grate using long-handled tongs.
-

4Sear and flip the chops.
Place the lamb chops directly over the coals on the hot side of the BBQ for searing. Watch for flare-ups from the olive oil or rendering fat. Once brown, flip and sear the other side.
-
5
Move to warm side.
Move the chops to the cooler side of the BBQ and place the lid on to finish cooking to your desired internal temperature and doneness. For most chops this takes no more that seven minutes total.
-
6
Check for doneness.
Using a digital instant-read meat thermometer, check the temperature of chops while on the BBQ. The chops are rare at 49°C, medium rare at 52°C, medium at 54°C, and well done at 63°C and higher. Lamb can take on a gamey flavor when cooked past medium.
-
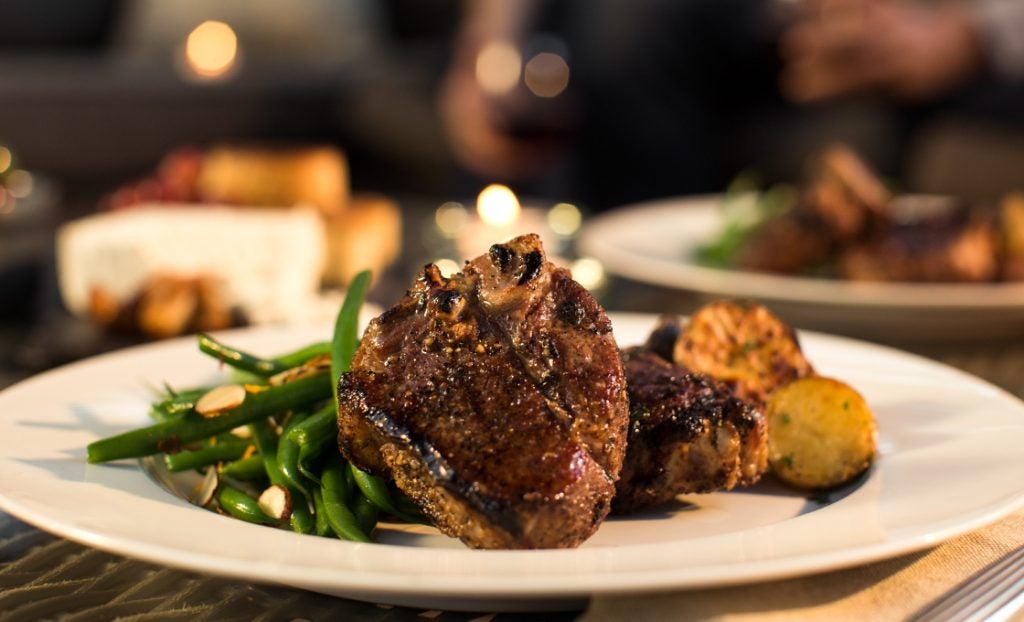
7Rest chops and serve.
Just like with steak, it’s important to let lamb chops rest for about 10 minutes. Remove the chops from the BBQ, place on a platter and let them rest, loosely tented under foil. During this time, the juices redistribute throughout the meat. After resting, plate and serve your chops.
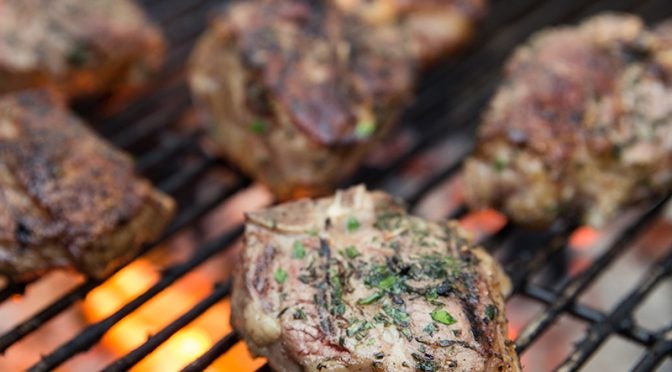
How to: grilled ham
- Cut:Ham
- When it's Done:57°C
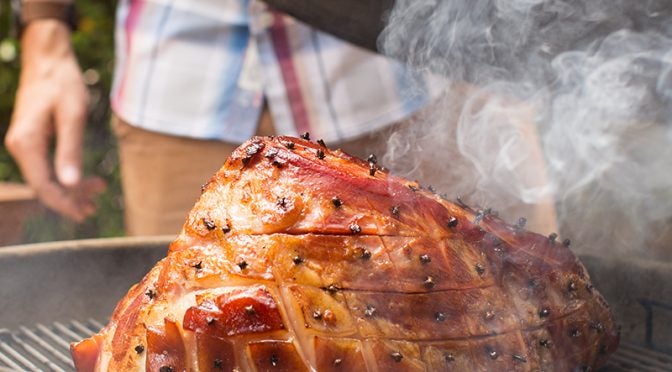
If you think you love ham now, wait until you try it on the grill. Sometimes called double-smoked ham, the already smoky flavor of a ham is enhanced beautifully when grill-roasted over charcoal. Seasoned and glazed, the finished grilled ham will be a showstopping centerpiece of your table.
-
1
Buy the right ham.
When choosing a ham, any cooked and cured ham will do. Shank portion, butt portion, loaf-style hams—they all work equally well. Please note, it’s important not to use an uncured or fresh ham—preparing those properly is a more complicated, time-consuming process. Just select a fully cooked ham from the grocery store and let the charcoal do the rest.
2Set up a parallel fire.
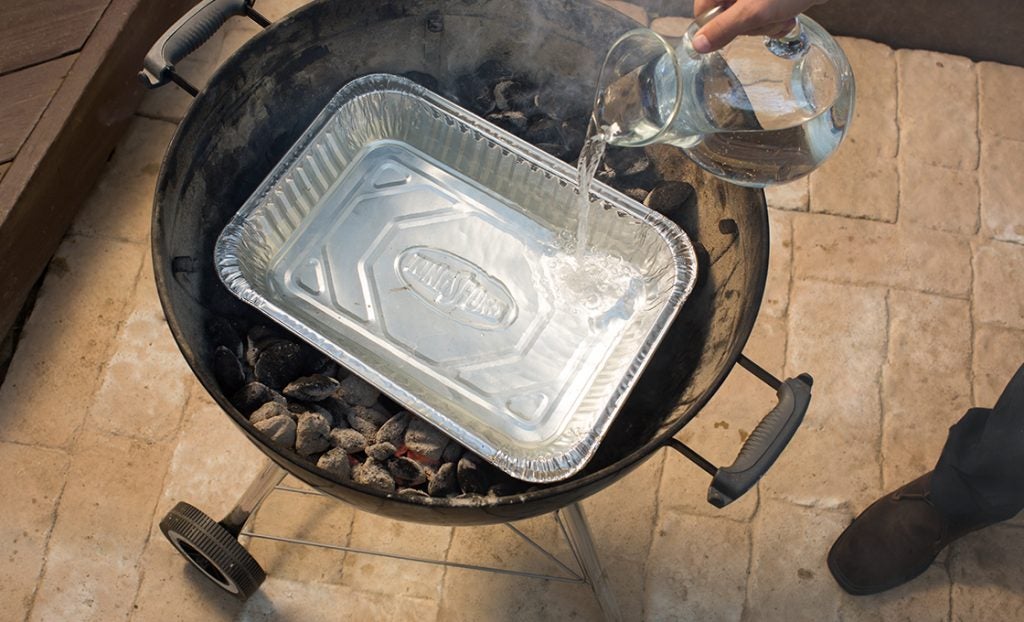
Set up your coals in a parallel configuration. In this configuration, coals burn slowly in two rows on either side of the grill, with a water pan in the center to provide a moist environment and help stabilize temperatures. This configuration provides long, steady heat for grill-roasting your ham.
-
3Season the ham.
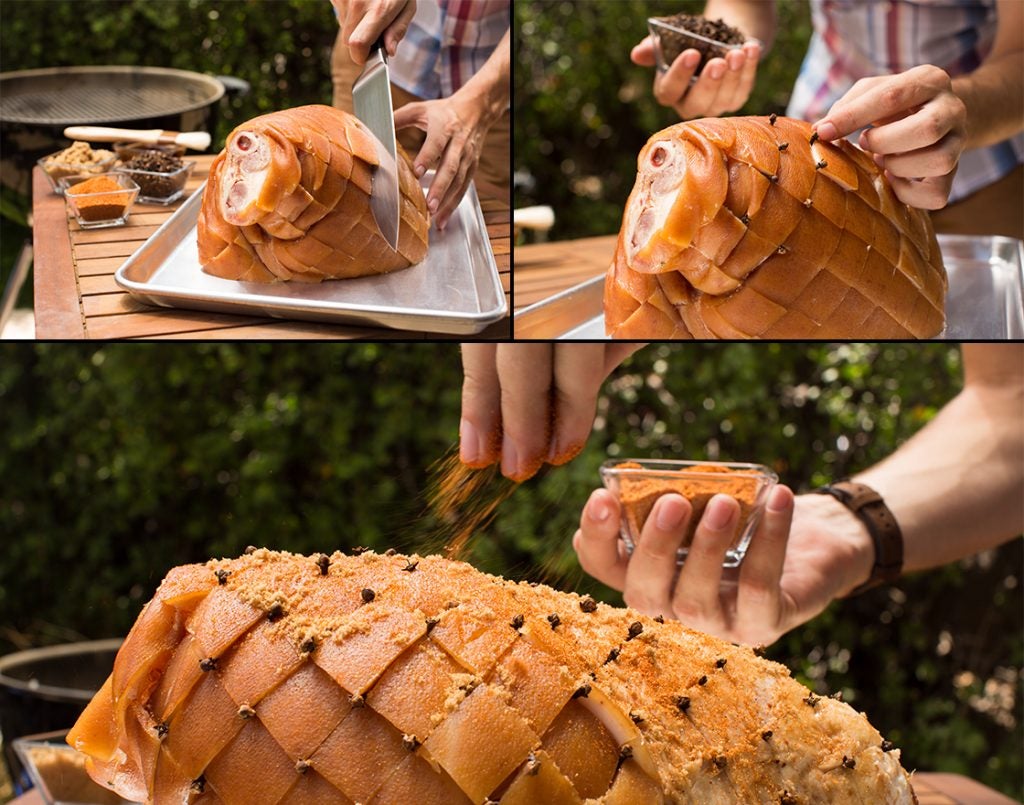
Prepare your ham with the seasoning of your choice. Start by scoring the ham about ¼-inch deep in a crosshatch pattern to allow seasonings to penetrate the meat. Then apply the seasonings: whole cloves, dry mustard, herbs, brown sugar, even pineapple rings are traditional favorites.
-
4Grill-roast the ham over indirect heat, parallel configuration.
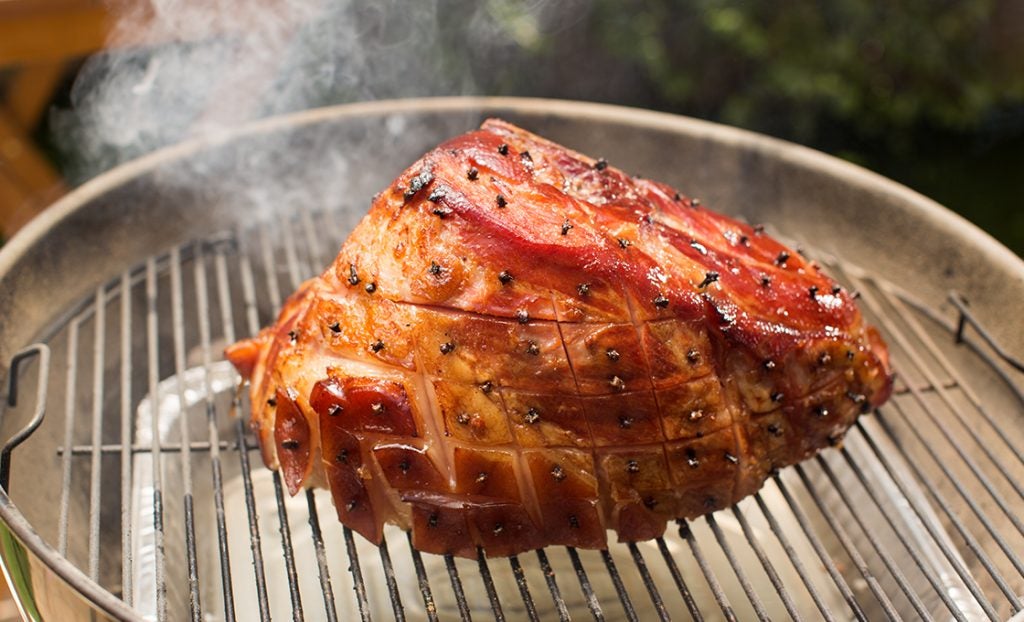
Place the seasoned ham in the center of the grate, right over the water pan with the coals on either side. Put the lid on your grill and adjust your vents to maintain a temperature of about 325ºF. Add more coals as necessary. Since hams are already smoked, additional smoke wood is not essential, but you can add some if you like. Let your ham grill-roast for roughly 15 minutes per pound. Because the ham is already fully cooked, you just need to bring it up to temperature.
-

5Glaze the ham.
When the ham reaches about 49°C, it’s time for you to apply a sweet glaze, if you like. Glazes typically contain a dominant sweet element like honey or maple syrup, cut with mustard and often bourbon or whiskey. Brush the glaze on periodically until the ham reaches a final temperature of 57°C.
-
6Slice and serve.
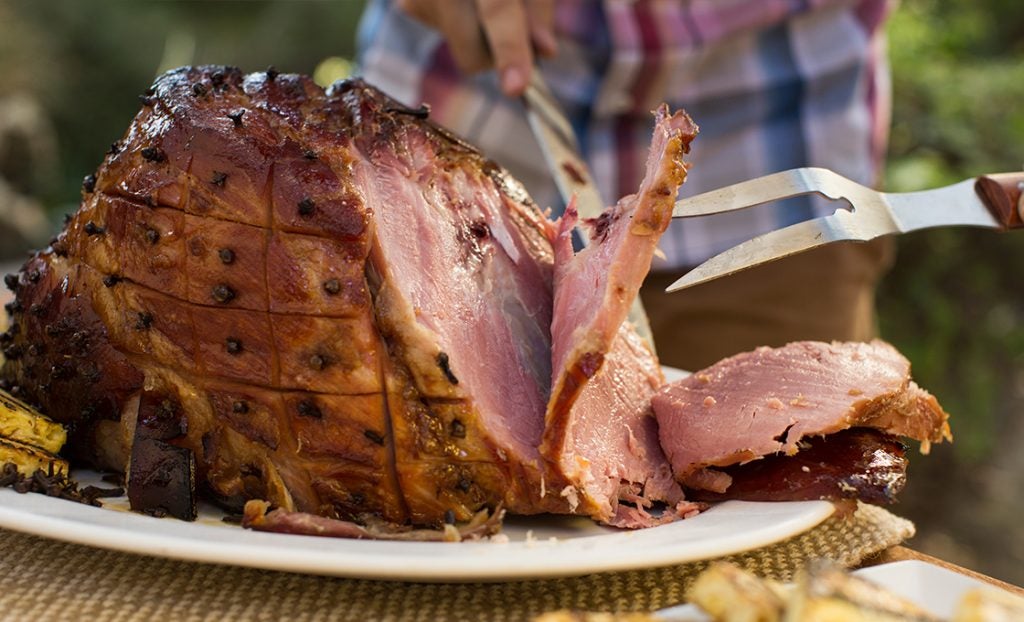
Let the ham rest for about 10 minutes to cool prior to slicing. Slice the ham across the grain into slices about ¼-inch thick. If you have a bone-in ham, cut large pieces of the ham away from the bone first, then thinly slice the large pieces on your cutting board.
